Introduction
Transforming a yard with astro turf elevates the outdoor experience by providing a lush, green oasis without the hassle of traditional lawn care. This guide outlines four essential steps for installing artificial grass in Southern California, ensuring homeowners achieve a durable and visually appealing result. However, with numerous variables at play - from site preparation to selecting the right materials - what key factors can make or break a successful installation?
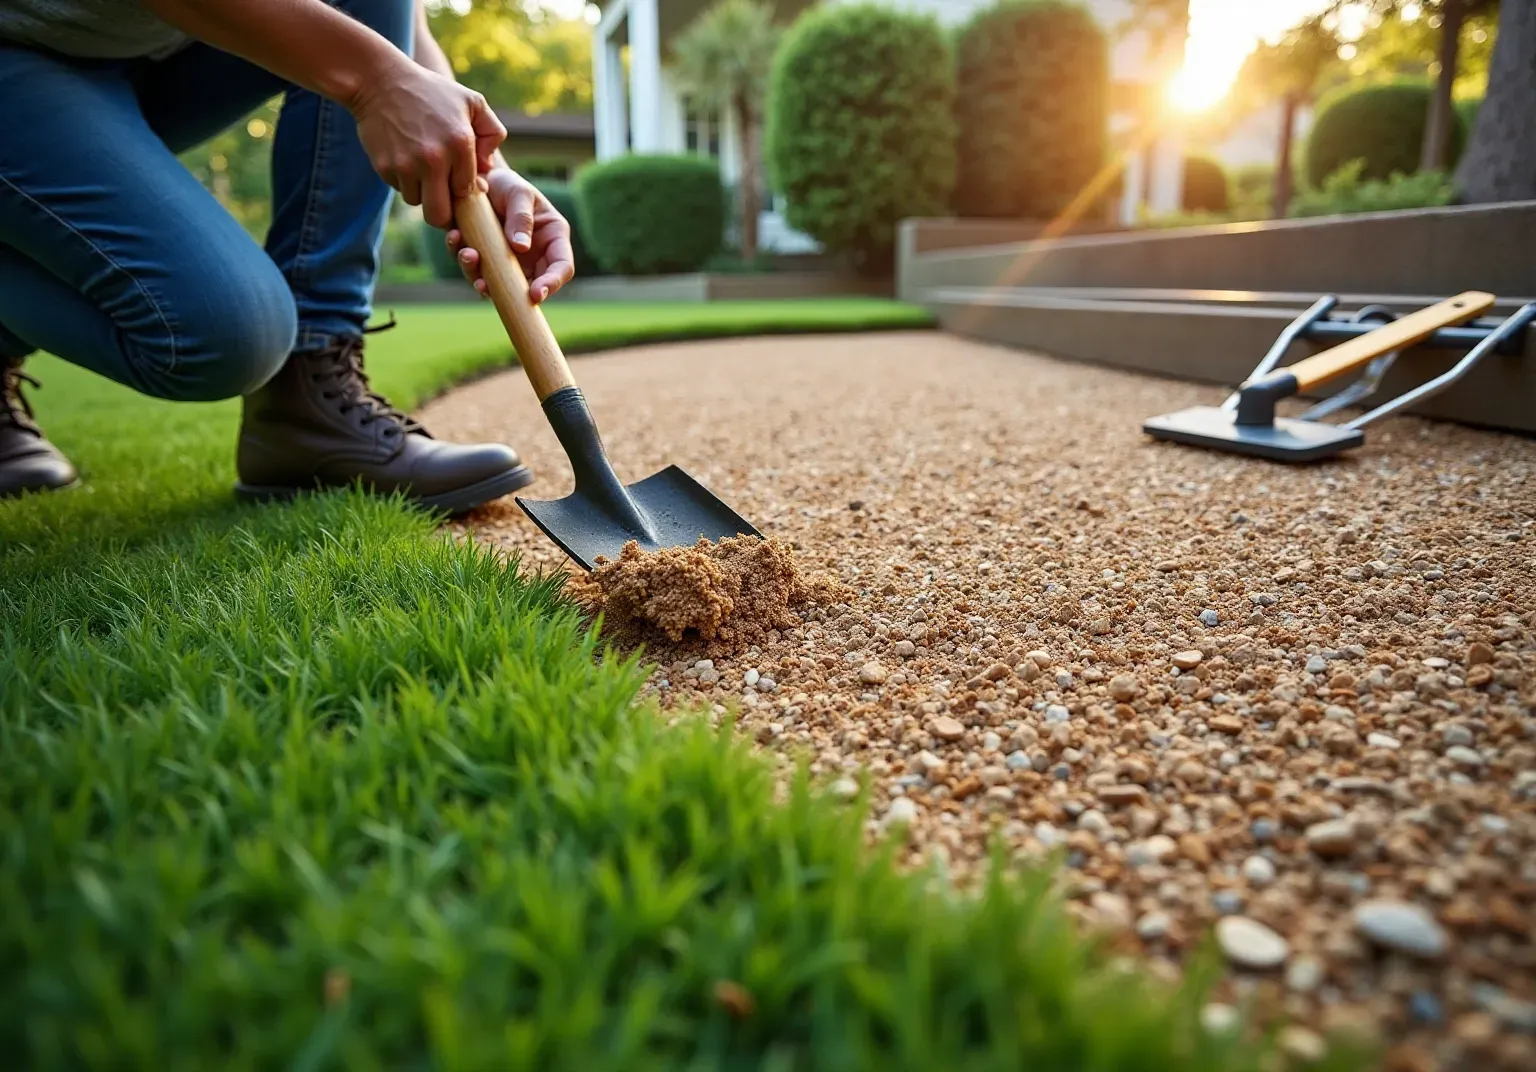
Prepare the Installation Site
- Clear the Area: Start by removing any existing grass, weeds, and debris from the designated installation site. Utilize a shovel or sod cutter to ensure the area is thoroughly clean. Landscaping professionals emphasize that a well-prepared area not only enhances aesthetic appeal but also of the .
- : Inspect for any low spots where water might pool. If necessary, adjust the grading to create a slight slope away from structures to facilitate drainage. ; if not managed, it can lead to water accumulation, which may harm the grass over time.
- : Employ a rake to , ensuring it is smooth and even. This step is crucial to avoid uneven surfaces that could . The preparation for installation typically requires between 5 to 25 hours of work for residential lawns, so should plan accordingly.
- : After leveling, using a plate compactor. This creates a solid base that prevents settling over time, ensuring the turf remains stable and flat. Successful setups often highlight the importance of thorough site preparation, which can significantly impact the overall .
By following these steps and considering the time commitment required, can ensure a .

Install the Base Layer for Turf
- Choose the Right Material: Select a base material such as , which are well-suited for Southern California's climate. These materials provide excellent drainage and stability, which are essential for a long-lasting very near me. Proper drainage helps and unpleasant odors, thereby ensuring the durability and functionality of your .
- Spread the Base Layer: Distribute the base material evenly across the installation area, aiming for a depth of 3 to 4 inches. Use a rake to achieve a uniform spread, which is vital for . Additionally, consider applying a thin layer of sand over the compacted base to create a .
- Compact the Base: Utilize a plate compactor to thoroughly compact the base material. This step is crucial to prevent future settling and to create a solid foundation that will effectively support the synthetic grass. A well-prepared base is essential for very near me, as it not only enhances the appearance of your but also helps it withstand wear and tear.
- Check for Levelness: After compaction, use a level to ensure that the surface is even. Make any necessary adjustments to achieve a smooth, flat surface, which is critical for the performance and aesthetics of the grass. Furthermore, consider using geotextile fabric as a to improve durability and maintain the visual appeal of your installation.

Lay and Secure the Artificial Turf
- Roll Out the Surface: Start by rolling out the over the prepared base. Ensure that the grass is laid in the desired direction to maintain a natural appearance. is crucial, as it helps prevent issues such as , which often occur in inadequately installed grass systems.
- Trim the Edges: Utilize a utility knife to of the grass for a precise fit in the area. Take care to cut along the seams to avoid fraying, which can compromise both the integrity and appearance of the grass.
- Secure the Grass: Fasten the edges of the grass to the ground using landscape staples or grass nails. Place them every 6-12 inches along the perimeter to ensure the grass remains securely in position. Experts emphasize that is essential for maintaining its durability and preventing movement.
- Seam the Grass: If multiple sections of grass are used, apply to connect the pieces. Press firmly to ensure a strong bond. This step is vital for achieving a seamless look and ensuring durability in .
By adhering to these steps, homeowners can achieve a professional-quality installation that enhances their outdoor space while . , such as cleaning and brushing, are also recommended to extend the longevity of , which typically lasts between 10 to 15 years with appropriate care.

Apply Infill and Finalize the Installation
- Choose the Right Filling: Selecting the is essential for the performance of your . Options such as PureZEO Pro, a natural and organic material, or Landscape Silica Sand should be chosen based on the turf's intended use-whether for pets, playgrounds, or athletic fields. , significantly improving the overall experience. Additionally, infill can extend the lifespan of by 2-3 years, making it a vital component of your installation.
- Spread the Material: Use a broadcast spreader to evenly distribute the material across the grass surface. Aim for a depth of approximately 1/2 inch to 1 inch, depending on the specific type of grass being installed. This depth is crucial for maintaining the grass blades' upright position and ensuring a .
- Brush the Turf: After applying the granules, utilize a to work the material into the fibers. This step is important as it helps the material settle properly, keeping the grass blades upright and enhancing the lawn's visual appeal.
- Final Inspection: to identify any areas that may require additional material or modifications. Ensuring that the surface is secure and appears natural is key to successfully completing the project. will also help maintain the grass's functionality and appearance over time. To , multiply the total square footage of the turf area by the recommended fill weight per square foot.

Conclusion
Successfully installing astro turf in Southern California requires a meticulous approach that, when executed correctly, results in a beautiful and durable lawn. The key takeaway is the significance of thorough preparation and execution throughout the installation process, from site preparation to infill application. This ensures that the artificial grass not only looks appealing but also performs well over time.
Key steps include:
- Clearing and leveling the installation site: This foundational step is crucial for a smooth surface.
- Choosing the right base material: Selecting appropriate materials supports the turf's longevity.
- Properly laying and securing the turf: Ensuring the turf is well-placed and anchored is vital for stability.
- Applying the appropriate infill: This enhances the turf's performance and appearance.
Each stage plays a vital role in achieving a seamless installation that enhances the outdoor space while minimizing future maintenance. Homeowners should consider the climate and specific needs of their turf to ensure long-lasting results.
In conclusion, dedicating time and effort to these installation steps is essential for achieving a professional-quality astro turf setup. By adhering to this guide and prioritizing careful preparation, homeowners can reap the benefits of a stunning and functional lawn. Embracing these best practices not only leads to immediate satisfaction but also contributes to the turf's longevity, making it a worthwhile investment for years to come.
Frequently Asked Questions
What is the first step in preparing the installation site for artificial grass?
The first step is to clear the area by removing any existing grass, weeds, and debris. This can be done using a shovel or sod cutter to ensure the site is thoroughly clean.
Why is assessing drainage important before installing artificial grass?
Assessing drainage is important to identify any low spots where water might pool. Proper drainage is essential to prevent water accumulation, which can harm the grass over time.
How should the ground be prepared before installing artificial grass?
The ground should be leveled using a rake to ensure it is smooth and even. This helps avoid uneven surfaces that could damage the grass.
What tool is recommended for compacting the soil after leveling?
A plate compactor is recommended for compacting the soil, as it creates a solid base that prevents settling over time, ensuring the turf remains stable and flat.
How much time should homeowners expect to spend on preparing the site for artificial grass installation?
Homeowners should expect to spend between 5 to 25 hours preparing the site for artificial grass installation, depending on the size of the residential lawn.
List of Sources
- Prepare the Installation Site
- How Long Does It Take To Install Artificial Turf? (https://greenforever.com/how-long-does-it-take-to-install-artificial-turf)
- Understanding California's New Stance on Artificial Turf (https://helixdreamscapes.com/understanding-californias-new-stance-on-artificial-turf)
- Dog Park Case Studies - Natura (https://natura-turf.com/solana)
- Plastic Turf Fields Are Taking Over America (https://nytimes.com/2025/07/26/business/artificial-turf-grass-sports.html)
- Install the Base Layer for Turf
- How to Choose the Right Base for Artificial Grass (https://realturf.com/us/what-sub-base-is-best-for-your-artificial-grass)
- What’s the Best Base for Artificial Grass Installation? - US Turf (https://us-turf.com/uncategorized/best-base-artificial-grass-installation)
- Best Base for Artificial Turf: What Matters | US Turf (https://usturfsandiego.com/news/ideal-base-for-artificial-turf)
- Step-by-Step Guide to Installing Artificial Grass in California’s Diverse Climate (https://agsturf.com/artificial-turf-news/Step-by-Step-Guide-to-Installing-Artificial-Grass-in-California-s-Diverse-Climate-0108.html)
- stabuiltpavers.com (https://stabuiltpavers.com/what-to-put-under-artificial-grass-for-drainage)
- Lay and Secure the Artificial Turf
- Synthetic Turf News | Stadia Magazine (https://stadia-magazine.com/news/synthetic-turf)
- How Long Do Turf Fields Last? - Keystone Sports Construction (https://keystonesportsconstruction.com/how-long-do-turf-fields-last)
- How Long Does Artificial Turf Last? What Homeowners Need to Know - Synthetic Turf (https://syntheticturfnorthwest.com/how-long-odes-turf-last)
- Artificial Turf Industry News & Updates - Mighty Grass (https://mightygrass.com/news)
- Apply Infill and Finalize the Installation
- Emerging opportunities in fertile synthetic turf - Floor Covering News (https://fcnews.net/2025/08/emerging-opportunities-in-fertile-synthetic-turf)
- What’s Trending in Turf? 2026’s Most Unique Artificial Grass Landscape Ideas - OC Turf & Putting Greens (https://octurfandputtinggreens.com/whats-trending-in-turf-2026s-most-unique-artificial-grass-landscape-ideas)
- onlinelibrary.wiley.com (https://onlinelibrary.wiley.com/doi/full/10.2134/itsrj2016.10.0848)
- hallturf.com (https://hallturf.com/how-much-infill-for-artificial-grass-a-homeowners-guide)
- bellaturf.ca (https://bellaturf.ca/blog/artificial-grass-how-much-infill-do-i-need)