Introduction
Transforming a backyard into a safe and enjoyable playground for children is a significant undertaking. The solution lies in the installation of artificial turf, a versatile surface that not only provides a lush, green aesthetic but also requires careful preparation to ensure durability and safety. As families increasingly seek low-maintenance alternatives to traditional grass, it’s essential to understand the steps necessary for a successful installation. This guide outlines four crucial steps to help homeowners create a vibrant, functional play area that minimizes upkeep while maximizing fun.
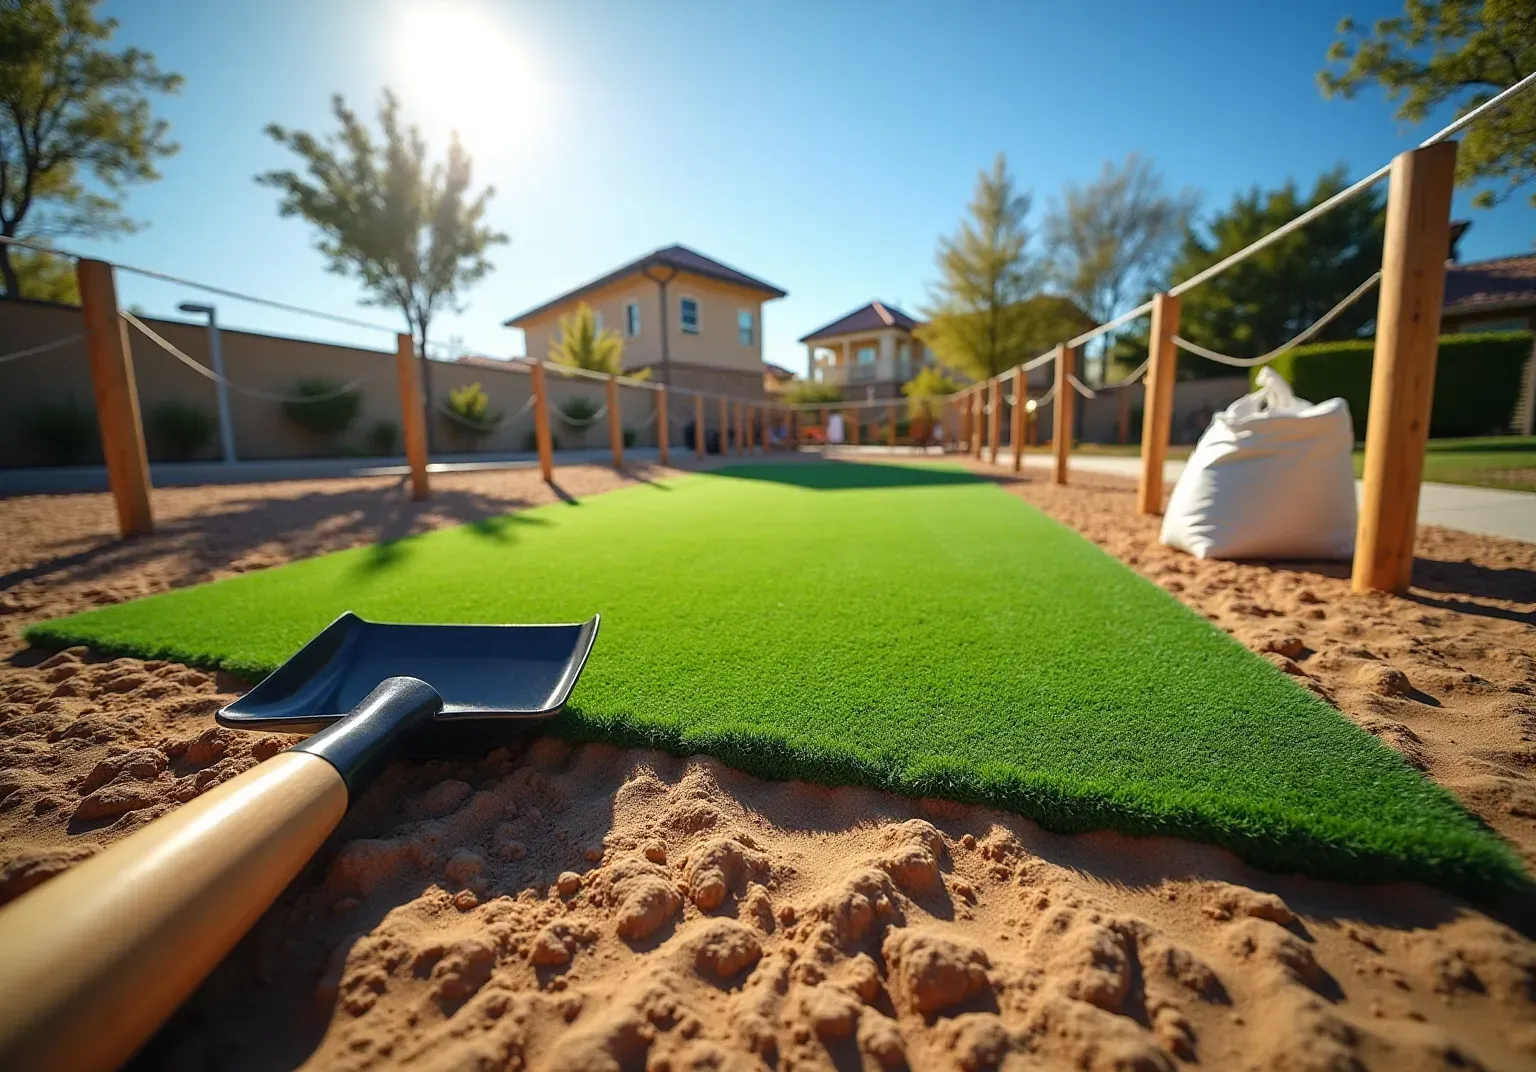
Prepare the Installation Area
- Clear the Area: Start by , weeds, or debris from the designated setup site. Use a shovel or a sod cutter to eliminate all organic material down to the soil, creating a clean slate for the grass installation.
- : Once cleared, with a rake. This step is essential for establishing a smooth surface for the grass, helping to prevent uneven wear and drainage issues that could compromise its longevity.
- Check for Drainage: Verify that the location has . If the ground is too flat, consider grading it slightly to facilitate water runoff. This will help prevent pooling and maintain the integrity of the grass over time.
- Mark the Area: Use stakes and string to outline the perimeter of the installation area. This will help visualize the space and ensure proper arrangement of the grass.
In Southern California, the average cost of typically ranges from $9 to $20 per square foot, influenced by factors such as site complexity and grass quality. Landscape experts emphasize that thorough preparation is vital for a , as it minimizes future . Specialists also recommend using a to prevent weed growth beneath the synthetic grass, ensuring a durable and .

Lay a Stable Sub-Base
- : Select a suitable , such as crushed stone or decomposed granite. These materials provide and stability.
- Excavate the Area: Dig down approximately 3-4 inches to . This depth enables sufficient drainage and prevents the grass from becoming uneven.
- Spread the Sub-Base: Evenly distribute the across the excavated area. Use a rake to ensure a .
- : Utilize a plate compactor or a hand tamper to material. This step is crucial for , ensuring a that will support the turf and withstand foot traffic.

Add Infill for Stability and Comfort
- Select the Right Filling: Choose an appropriate filling material, such as silica sand or rubber granules. Silica sand is recognized for its and cost-effectiveness, while , enhancing safety and comfort for children during play. Experts indicate that with by up to 50%, making it a crucial choice for playground setups. As noted by grass expert Brock, "The appropriate material not only boosts safety but also improves the overall play experience of the surface."
- Distribute the Material: Employ a broadcast spreader to uniformly distribute the fill substance over the grass surface. Aim for a depth of approximately 1/2 inch to 1 inch, depending on the specific type of grass and material used. Proper application is vital, as it ensures stability and performance, particularly in high-traffic areas.
- Brush the Grass: After distributing the material, utilize a stiff-bristle broom to align the grass fibers vertically. This step is essential for and that the grass maintains its natural appearance. Brushing also enhances the overall playability of the surface, making it more inviting for children.
- Check for Evenness: Conduct a thorough inspection of the surface to confirm that the material is evenly distributed and that the grass fibers are standing upright. Adjust as necessary to achieve a uniform appearance. Consistent maintenance of infill levels in can lead to a reduction in upkeep tasks by up to 50%, ensuring a beautiful and functional play area for years to come. Furthermore, homeowners should recognize that approximately , underscoring the importance of sustainable choices. Additionally, it's crucial to consider that can reach temperatures exceeding 150-170°F in warm weather, posing risks of heat-related injuries, especially for children.

Secure and Trim the Turf Edges
- Secure the Edges: To ensure the grass remains firmly in place, use landscape staples or galvanized nails, placing them every 6 to 8 inches along the perimeter. This method is crucial, as inadequate edge security often leads to shifting and . As David Barbera emphasizes, 'Selecting the appropriate technique to and implementing it properly is essential for a .'
- : Use a sharp utility knife to carefully trim any excess grass along the edges. This step is vital for achieving a that follows the contours of the installation area, contributing to a polished appearance.
- : If applicable, of the grass under adjacent surfaces such as concrete or decking. It is advisable to use a professional carpet tucking tool for this task, as it features a smooth edge that won't damage the turf fibers. However, exercise caution, as tucking the edges in high-traffic zones can create trip hazards and potential injuries.
- Final Inspection: After securing and trimming, conduct a thorough . Check for any loose areas or imperfections, making necessary adjustments to ensure a professional finish. Taking the time for this step can prevent future maintenance issues and ensure the longevity of your .

Conclusion
Installing playground artificial turf at home involves a series of well-defined steps that ensure a safe, functional, and aesthetically pleasing play area. By following these procedures, homeowners can create a durable surface that enhances outdoor play while minimizing maintenance efforts.
The installation process begins with thorough preparation of the area, which includes:
- Clearing
- Leveling
- Ensuring proper drainage
This foundation is further strengthened by laying a stable sub-base and incorporating the right infill material, enhancing both safety and comfort. Finally, securing and trimming the turf edges not only contributes to a polished appearance but also prevents potential hazards, ensuring that the installation stands the test of time.
Ultimately, investing time and effort into each step of the playground artificial turf installation can lead to a remarkable transformation of outdoor spaces. By prioritizing preparation, material selection, and proper finishing techniques, homeowners can create a sustainable and enjoyable environment for children to play in. Embracing these best practices enhances the immediate play experience and contributes to long-term benefits, making it a worthwhile endeavor for any backyard.
Frequently Asked Questions
What is the first step in preparing the installation area for artificial turf?
The first step is to clear the area by removing any existing grass, weeds, or debris from the designated site using a shovel or a sod cutter.
Why is it important to level the ground before installing artificial turf?
Leveling the ground is essential to establish a smooth surface for the grass, which helps prevent uneven wear and drainage issues that could compromise its longevity.
How can I check for proper drainage in the installation area?
Verify that the location has adequate drainage; if the ground is too flat, consider grading it slightly to facilitate water runoff and prevent pooling.
What method can I use to mark the installation area?
You can use stakes and string to outline the perimeter of the installation area, which helps visualize the space and ensures proper arrangement of the grass.
What is the average cost of playground artificial turf installation in Southern California?
The average cost typically ranges from $9 to $20 per square foot, influenced by factors such as site complexity and grass quality.
Why is thorough preparation important for artificial turf installation?
Thorough preparation is vital for a successful installation as it minimizes future maintenance and enhances the overall performance of the turf.
What additional recommendation do specialists make for playground artificial turf installation?
Specialists recommend using a weed barrier during installation to prevent weed growth beneath the synthetic grass, ensuring a durable and low-maintenance play area.
List of Sources
- Prepare the Installation Area
- revivelandscape.com (https://revivelandscape.com/average-cost-of-artificial-turf-in-california)
- How Much Does Turf Cost in California? (2026 Guide) (https://bigbullyturf.com/how-much-does-turf-cost-in-california)
- A Step-by-Step Guide to Installing Artificial Turf Grass (https://lowes.com/n/how-to/install-artificial-grass)
- How Much Does Artificial Grass Cost: Pricing Guide in 2026 (https://siteprep.com/articles/artificial-grass-installation-cost)
- Lay a Stable Sub-Base
- Ultra Base | The Ultimate Sub Base for Artificial Turf (https://ultrabasesystems.com/commercial-applications.html)
- What Goes Under Artificial Turf? Best Base Materials for Artificial Grass Installation (https://mightygrass.com/what-goes-under-artificial-turf)
- How to Choose the Right Base for Artificial Grass (https://realturf.com/us/what-sub-base-is-best-for-your-artificial-grass)
- Choosing & Installing the Best Sub-Base for Artificial Grass (https://ccgrass.com/best-sub-base-for-artificial-grass)
- What to put under artificial grass for drainage? (https://petgrows.com/blogs/news/what-to-put-under-artificial-grass-for-drainage)
- Add Infill for Stability and Comfort
- How to Choose Artificial Turf Infill: Infill Buying Guide (https://flooringinc.com/blog/artificial-turf-infill?srsltid=AfmBOooh9PQCU-KLCRY-PzUDiueDsjMDKJjzJe1ZF_qRg74ouD_KOXFn)
- Turf Wars: The Update (https://theunbiasedscipod.substack.com/p/turf-wars-the-update)
- sportsvenuecalculator.com (https://sportsvenuecalculator.com/knowledge/artificial-turf-field/artificial-turf-infill-material-options)
- Artificial Turf Infill Options (Pros, Cons & Best Uses) | US Turf (https://usturfsandiego.com/news/artificial-turf-infill-options)
- 10 Benefits of Synthetic Turf Infill for Your Home – Hall Turf | Artificial Turf Installation Kansas City KS & MO (https://hallturf.com/10-benefits-of-synthetic-turf-infill-for-your-home)
- Secure and Trim the Turf Edges
- How to Secure Artificial Turf Perimeter Edges: Galvanized Nails or Sod Staples (https://artificialturfsupply.com/how-to/how-to-secure-artificial-turf-perimeter-edges-galvanized-nails-or-sod-staples)
- syntheticgrasswarehouse.com (https://syntheticgrasswarehouse.com/company/ask-an-expert/ask-jw/tucking-synthetic-turf-edges)
- How Do You Secure The Edges of Artificial Grass? (https://mylovelylawn.com/how-do-you-secure-the-edges-of-artificial-grass)
- Ultimate Guide to Securing Artificial Turf (https://premiumgrassblades.com/the-ultimate-guide-to-securing-artificial-turf-spiral-nails-staples-and-proper-installation)
- Here’s Why Edging Is Essential When Installing Synthetic Turf - SGW Dallas (https://sgwtexas.com/dallas/blog/2024/02/22/heres-why-edging-is-essential-when-installing-synthetic-turf)