Introduction
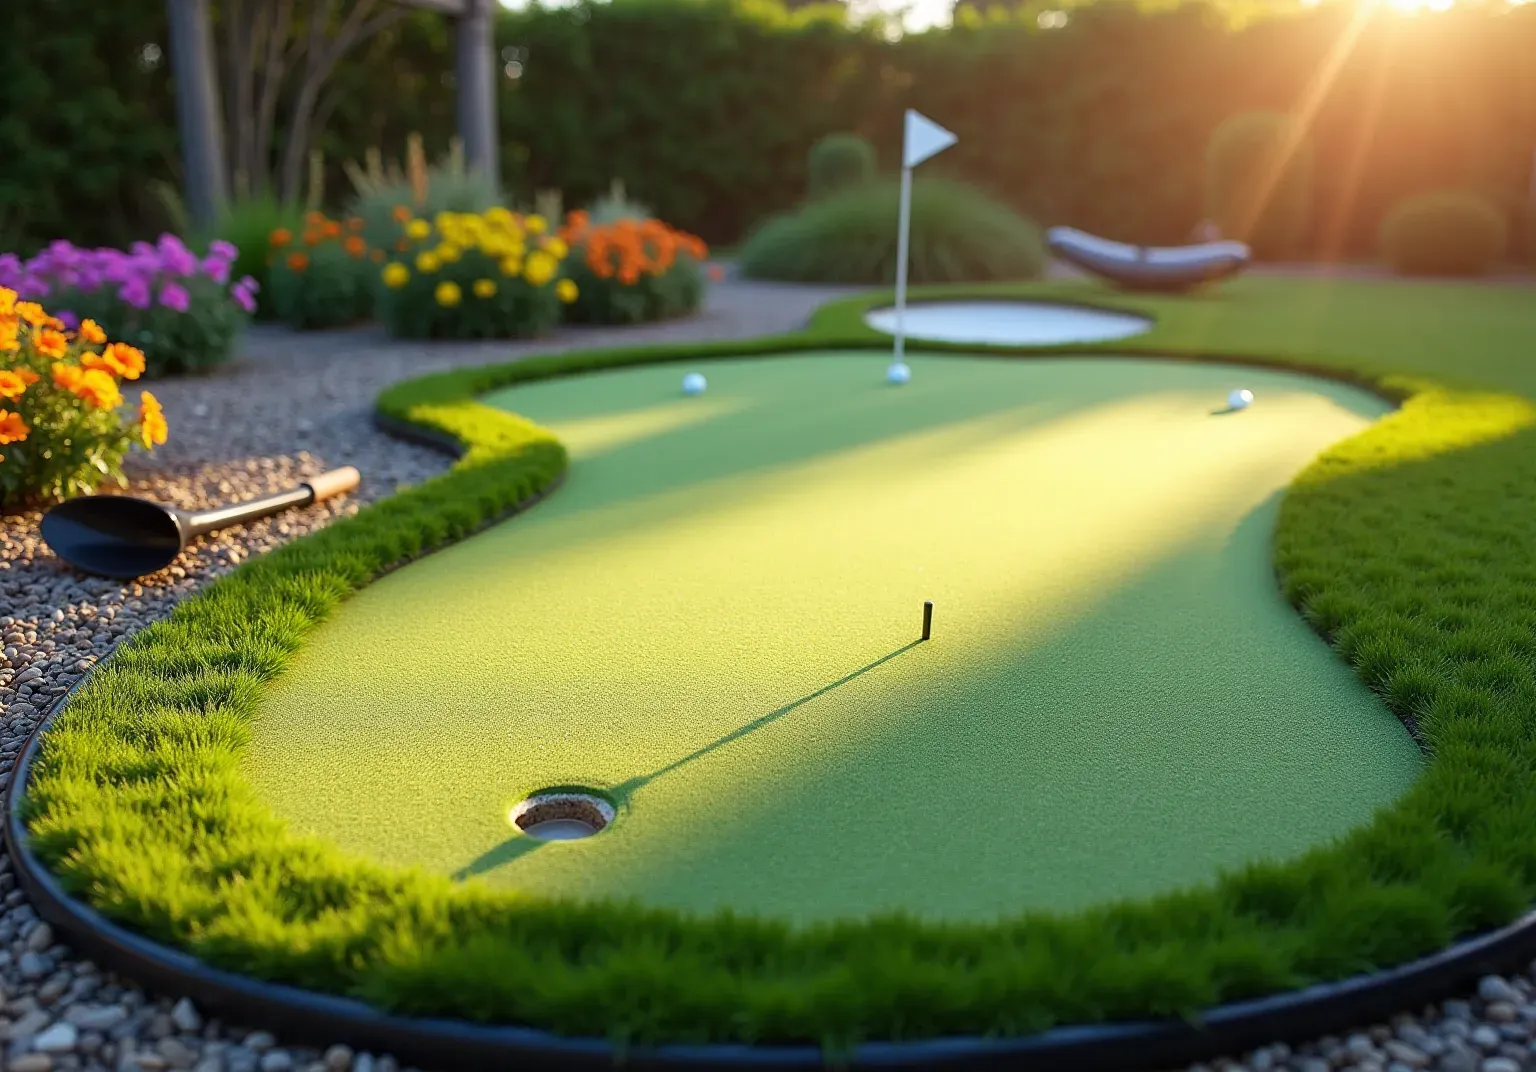
Creating a backyard putting green provides golf enthusiasts with an excellent opportunity to practice their skills from the comfort of home. This guide presents four straightforward steps to design, construct, and maintain a personal putting green. Not only does this enhance the outdoor aesthetics of your property, but it also offers a professional golfing experience.
However, homeowners face numerous options regarding materials, layout, and local regulations. To ensure that their project meets both golfing needs and community standards, careful consideration is essential.
Plan Your Backyard Putting Green
- Choose the Location: Select a flat area with and ample sunlight to ensure optimal performance. Avoid heavily shaded areas where tree roots may disturb the turf and debris can gather, as these factors can impede the durability and functionality of .
- Determine: Assess the available space and how you intend to use the area. A typical size is about 10x15 feet, but many homeowners opt for areas ranging from 100 to 800 square feet, accommodating 1-2 holes for diverse practice shots. This flexibility allows you to customize the turf to fit yard's dimensions and golfing requirements.
- Design Features: Enhance by incorporating elements such as bunkers, slopes, or multiple holes. These features not only improve aesthetic appeal but also provide challenges that mimic real course conditions. Sketching your design can help visualize the layout and ensure it meets .
- Check: Before proceeding, verify that your plans comply with local zoning laws or HOA regulations regarding landscaping and structures. This step is crucial to avoid and to ensure your aligns with community standards.

Gather Materials and Tools
Collecting the appropriate materials and tools is crucial for establishing your with .
- Synthetic Grass: Select specifically designed for golf courses. This choice guarantees longevity and a natural appearance. California Turf Company's synthetic grass is crafted from high-quality materials, mimicking the look, texture, and performance of natural grass. The ranges from $4 to $15 per square foot.
- Base Material: Utilize to ensure effective drainage and stability for the putting green. For a basic installation, fill in 4 inches with a crushed rock base, compacted to 90%-95% density, to create a solid foundation for your grass.
- Weed Barrier Fabric: Install this fabric to prevent weeds from growing through the grass, maintaining a clean and neat appearance. This step is essential for the , allowing you to enjoy a at home.
- Infill Material: Choose sand or rubber infill to support the grass's structure and enhance the realistic feel of the putting surface. Spread 0.5 - 1.5 pounds of infill per square foot evenly into the thatch of the turf for optimal performance, ensuring true ball roll and consistent play.
- Landscape Edging: Use edging materials to clearly define the perimeter of the area, contributing to both aesthetics and functionality. Secure the fringe with 5-inch non-galvanized nails every 3-6 inches to ensure stability, enhancing the overall look of your .
Tools Required:
- A shovel and rake for excavation and leveling the ground, ensuring proper ground preparation by excavating 3-5 inches of native soil.
- A tamper or plate compactor to ensure the base material is compacted properly.
- A utility knife for precise cutting of the grass.
- A tape measure and level to guarantee accurate measurements and alignment.
- Landscape staples or nails to secure the grass in place, ensuring it remains stable and well-fitted.

Construct the Putting Green Base and Install Turf
- Excavate the Area: Start by removing 3 to 5 inches of soil from the designated area to create a . Ensure the site is free of debris, rocks, and any vegetation that could interfere with the installation. It is crucial to remove all irrigation, tree roots, plants, and utilities before .
- Install the Base: Fill the excavated area with 4 inches of crushed stone, limestone chat, or decomposed granite. This material is essential for . Use a tamper or plate compactor to compact the base thoroughly, achieving at least 80% compaction to prevent future settlement. A well-compacted base ensures a smooth surface for optimal ball roll. Additionally, adjust the thickness of the base according to the expected foot traffic and the dimensions of the lawn.
- Lay the Weed Barrier: After compacting the base, place a weed barrier fabric over it. This step is vital to , which can disrupt the integrity of your over time.
- Roll Out the Grass: Lay the over the prepared base, ensuring it fits snugly. Use a utility knife to , leaving a slight excess around the edges for adjustments.
- Secure the Grass: Finally, use landscape staples or non-galvanized nails to secure the grass around the perimeter and at seams. Ensure the turf is taut and free of wrinkles, as a smooth surface is essential for a consistent golfing experience. Continuously check the grade around all hole cups while compacting to maintain proper drainage.

Add Finishing Touches and Maintain Your Green
- Add Edging: Start by around the perimeter of your . This creates a polished appearance and prevents the grass from shifting over time, ensuring a stable and defined space for play.
- Infill the Grass: To achieve a , evenly spread across the grass. This helps the fibers stand upright, mimicking the texture of natural grass. After applying the infill, use a stiff broom to brush the grass, ensuring the material is well-distributed and the fibers are properly aligned.
- Regular Maintenance: Maintaining a tidy is essential for both appearance and functionality. to prevent moisture retention and potential damage. Additionally, brush the periodically to keep them upright and avoid matting, which can affect playability.
- Check for Damage: to identify any signs of wear or damage. Promptly addressing issues such as tears or uneven surfaces is crucial for . can often be handled easily, ensuring your putting surface remains in top condition for practice and enjoyment.

Conclusion
Creating a backyard turf putting green can transform your outdoor space into a personal golfing haven, enhancing both your home and your practice sessions. By following the outlined steps-from careful planning and selecting the right materials to constructing and maintaining your green-you can achieve a professional-quality putting surface right in your yard.
Key insights from this guide emphasize the importance of:
- Choosing the right location
- Ensuring proper drainage
- Utilizing high-quality synthetic grass
Additionally, incorporating design features and adhering to local regulations can elevate your putting green experience. Regular maintenance, including infill and debris removal, is crucial for preserving the functionality and appearance of your green.
Ultimately, investing time and effort into creating a backyard putting green not only provides a unique recreational space but also enhances your golfing skills. Embrace the opportunity to enjoy this rewarding project and take your game to the next level right at home. Whether you're a seasoned golfer or just starting out, a well-designed putting green offers endless enjoyment and practice opportunities.
Frequently Asked Questions
What is the first step in planning a backyard putting green?
The first step is to choose a flat area with excellent drainage and ample sunlight to ensure optimal performance.
What should be avoided when selecting the location for a putting green?
Avoid heavily shaded areas where tree roots may disturb the turf and where debris can gather, as these factors can impede the durability and functionality of the putting surface.
What is the typical size for a backyard putting green?
A typical size is about 10x15 feet, but many homeowners opt for areas ranging from 100 to 800 square feet, accommodating 1-2 holes for diverse practice shots.
How can I customize the size and shape of my putting green?
You can customize the turf to fit your yard's dimensions and your golfing requirements based on the available space and how you intend to use the area.
What design features can enhance a backyard putting green?
You can incorporate elements such as bunkers, slopes, or multiple holes to improve aesthetic appeal and provide challenges that mimic real course conditions.
Why is it important to sketch the design of the putting green?
Sketching your design can help visualize the layout and ensure it meets your golfing preferences.
What should I check before proceeding with the installation of a putting green?
Before proceeding, verify that your plans comply with local zoning laws or HOA regulations regarding landscaping and structures to avoid potential issues during installation.
List of Sources
- Plan Your Backyard Putting Green
- How Much Space Is Needed for a Backyard Putting Green in Palm Desert? (https://visionturfandlighting.com/how-much-space-do-you-need-for-a-backyard-putting-green)
- How To Make Your Backyard Putting Green Dream a Reality (https://usga.org/content/usga/home-page/course-care/green-section-record/62/issue-17/how-to-make-your-backyard-putting-green-dream-a-reality.html)
- realturf.com (https://realturf.com/us/the-secret-to-a-perfect-backyard-putting-green)
- Smart Placement Tips for a Backyard Putting Green (https://fieldturflandscape.com/golf-putting-green/how-to-position-your-backyard-putting-green)
- Gather Materials and Tools
- Tour Greens | Backyard Putting Green Cost in 2025 (https://tourgreens.com/backyard-putting-green-cost.html)
- Creating a Backyard Putting Green? Here's what you'll need. (https://purchasegreen.com/blog/creating-a-backyard-putting-green)
- DIY Putting Green Installation: A Step-by-Step Guide (https://artificialturfexpress.com/blog/installing-the-best-putting-greens-in-your-yard-the-ultimate-diy-guide)
- How Much Does a Backyard Putting Green Cost? A Complete Cost Guide (https://stabuiltpavers.com/how-much-does-a-backyard-putting-green-cost)
- Artificial Turf Market Size And Share | Industry Report, 2033 (https://grandviewresearch.com/industry-analysis/artificial-turf-market)
- Construct the Putting Green Base and Install Turf
- Perfecting Putting Green Surfaces – Part 1 – Overview | Ask JW | Synthetic Grass Warehouse (https://syntheticgrasswarehouse.com/company/ask-an-expert/ask-jw/perfecting-putting-green-surfaces-part-1-overview)
- How To Make Your Backyard Putting Green Dream a Reality (https://usga.org/content/usga/home-page/course-care/green-section-record/62/issue-17/how-to-make-your-backyard-putting-green-dream-a-reality.html)
- A Guide To Installing An Artificial Putting Green (https://turftekusa.com/blog/a-guide-to-installing-an-artificial-putting-green)
- Four Tips for a Perfect Artificial Grass Putting Green Installation - SGW Nevada (https://sgwnevada.com/blog/four-tips-for-a-perfect-artificial-grass-putting-green-installation)
- Add Finishing Touches and Maintain Your Green
- How To Make Your Backyard Putting Green Dream a Reality (https://usga.org/content/usga/home-page/course-care/green-section-record/62/issue-17/how-to-make-your-backyard-putting-green-dream-a-reality.html)
- backninegreenseastbay.com (https://backninegreenseastbay.com/blog/simple-maintenance-tips-for-your-backyard-putting-green)
- Synthetic Turf Market | Global Market Analysis Report - 2035 (https://futuremarketinsights.com/reports/synthetic-turf-market)
- Artificial Putting Green Maintenance: Year-Round Care Guide (https://aglgrass.com/blogs/artificial-putting-green-maintenance)
- Essential Best Practices for Maintaining Residential Putting Greens – Hall Turf | Artificial Turf Installation Kansas City KS & MO (https://hallturf.com/essential-best-practices-for-maintaining-residential-putting-greens)