Introduction
Transforming a backyard into a lush, green oasis can often appear daunting, particularly when it comes to installing artificial turf. This guide clarifies the process, providing homeowners with a structured, step-by-step approach to achieving a beautiful, low-maintenance lawn. However, despite its seemingly straightforward nature, the journey to a flawless turf installation is filled with potential pitfalls. What are the essential steps that can determine the success of this project?
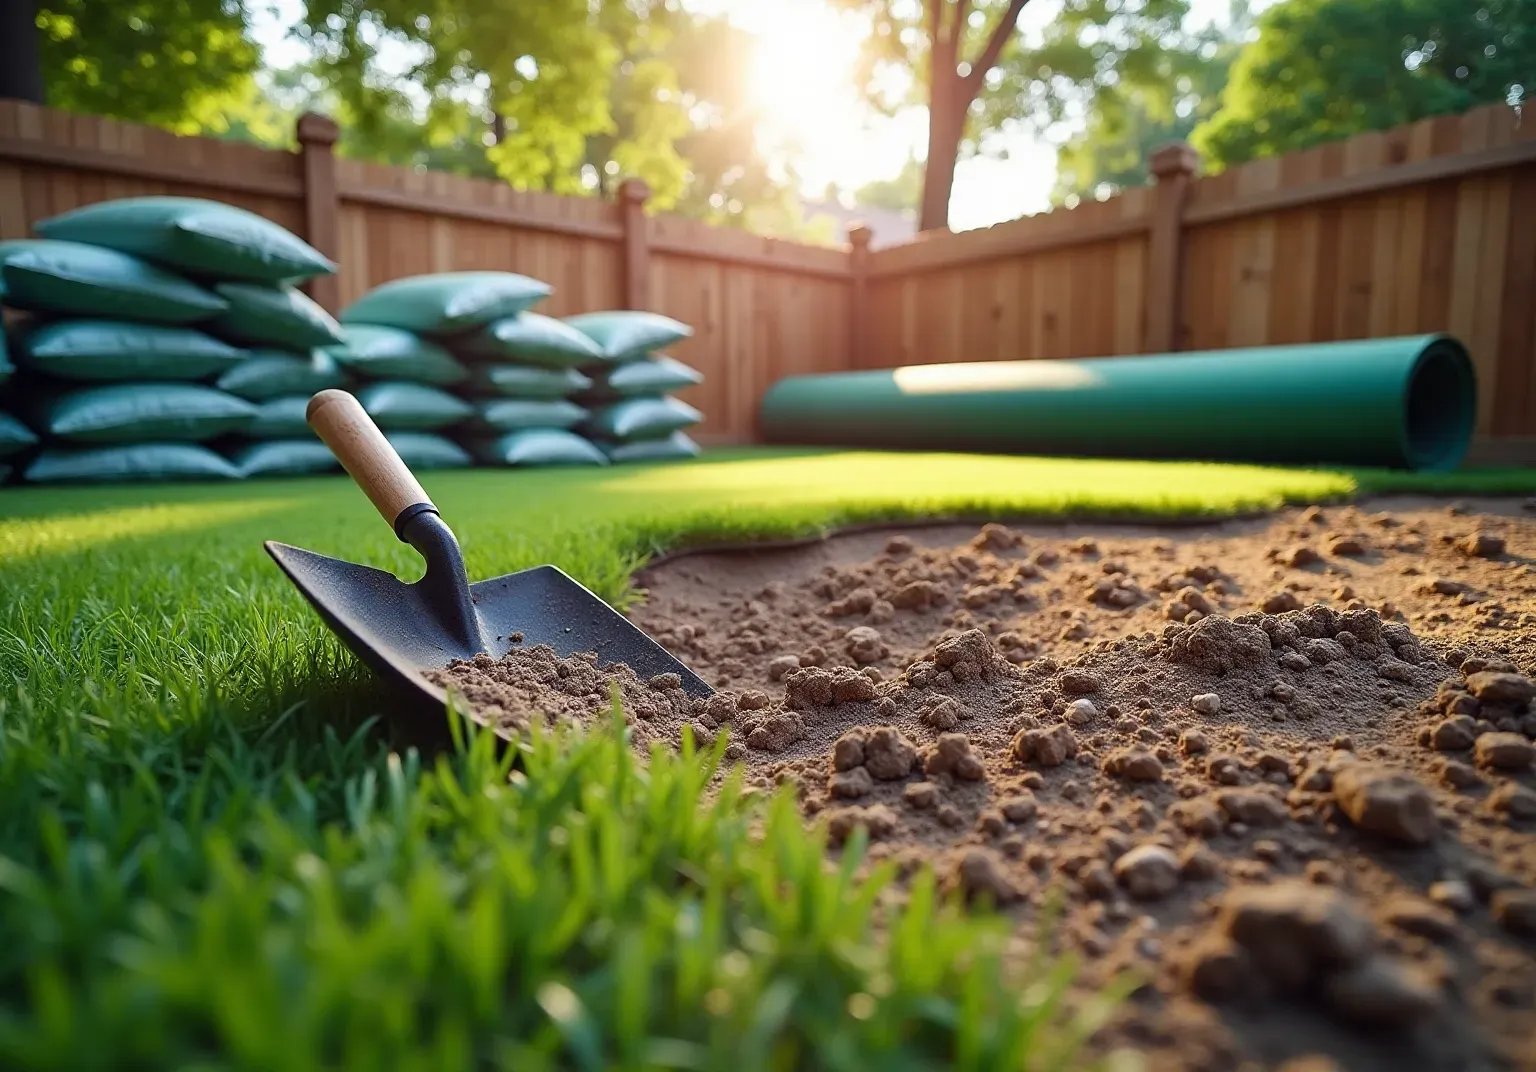
Prepare Your Backyard for Turf Installation
- : Begin by removing any existing grass, weeds, and debris from the installation site. To understand how to , utilize a shovel or sod cutter to dig down approximately 3-4 inches, eliminating roots and ensuring a clean surface for installation.
- Check for Drainage: It is crucial to ensure that the area has . The ground should slope away from any structures to prevent water pooling. A recommended slope of 2% will facilitate effective drainage.
- : Use a rake to , filling in any low spots with soil or gravel. To understand , compact the soil using a plate compactor or hand tamper to create a stable base for the installation.
- Install a: Lay down a geotextile fabric or to prevent weeds from growing through the turf. This step is essential for maintaining the integrity of over time.
- : Spread a layer of crushed rock or decomposed granite, approximately 2-3 inches thick, over the surface. This layer will provide a and assist in drainage. Ensure that this layer is compacted thoroughly before proceeding.

Lay Down and Cut the Artificial Turf
- Roll Out the Turf: Start by rolling out the as part of over the prepared area. To prevent any shrinking or expanding after learning , allow it to acclimate to the temperature for a few hours. This step is essential, as demonstrated by the City of Refuge's installation since April 2012, which has preserved its integrity despite heavy use.
- Trim the Grass to Fit: Utilize a utility knife to cut the grass to fit the designated area. Ensure you cut from the back side of the turf, following the stitch lines for a clean edge. Leave a slight overhang to guarantee complete coverage. As highlighted by industry professionals, are crucial for understanding , as they can significantly impact the quality of the installation.
- Join Multiple Pieces: If your installation involves several sections of sod, lay them side by side, ensuring the grain of the grass faces the same direction. Use seam tape and adhesive to join the pieces, pressing firmly to secure them. Choosing a can enhance the overall outcome of this process.
- Trim Edges: After laying the grass, trim any excess along the edges with a sharp knife. Ensure the edges are neat and fit snugly against any borders or structures. This attention to detail contributes to a polished appearance.
- Check for Wrinkles: Smooth out any wrinkles or bubbles by pulling the surface taut and re-securing it as necessary. This will ensure a flat and . Homeowners should also consider , which can help manage costs effectively. For those who may need assistance, we encourage you to initiate a with .

Secure and Finish Your Turf Installation
- : Fasten the edges of the lawn using or galvanized nails. Position these fasteners every 6-8 inches along the perimeter and at seams to prevent any movement.
- Add Infill: Depending on the grass type, it may be necessary to , such as sand or rubber granules. This helps the blades stand upright and . Spread the infill evenly across the surface with a broom.
- : After applying the infill, utilize a stiff-bristle broom to against the grain. This technique encourages the blades to stand up, enhancing the lawn's natural appearance.
- : Conduct a thorough walk-around of the installation to identify any loose spots or imperfections. Make necessary adjustments to ensure the grass is secure and appears uniform.
- : Remove any excess materials, tools, and debris from the site. Ensure the area is tidy and prepared for use, allowing the grass to settle appropriately.

Troubleshoot Common Turf Installation Issues
- : If you notice after installation, gently pull the material taut and secure it with additional staples or nails. For stubborn areas, a heat gun can soften the grass, allowing for effective smoothing. Promptly addressing these issues is crucial, as post-installation wrinkles can lead to if ignored. Additionally, ensure that the grass is installed with an appropriate thatch layer of ¼ to ½ inch to promote proper drainage and airflow.
- : An irregular ground surface often indicates problems with the base beneath. Gently lift the turf and assess the base material; you may need to re-level it to ensure a smooth setup. Proper preparation is essential, as s can result in dissatisfaction and performance issues. A minimum excavation depth of 3 inches is recommended to create a stable foundation and prevent future complications.
- : If water pools on the surface, it’s vital to check that the base was graded correctly. Ignoring water behavior prior to installation can lead to expensive repairs. Adjusting the slope or incorporating drainage solutions can prevent future pooling and ensure that water flows away from the installation site, keeping the lawn dry and usable.
- : can detract from the overall appearance of your lawn. To remedy this, lift the edges of the seams and apply seam tape and adhesive to securely rejoin them. Press the grass firmly together to eliminate gaps, ensuring a seamless look that enhances the aesthetic of your lawn.
- : Uneven infill can affect both the appearance and performance of your grass. Use a broom to evenly redistribute the infill across the surface, which will help maintain the turf's integrity and performance. Proper infill application is vital, as it supports the grass blades and improves drainage, contributing to a long-lasting installation. Utilizing specialized equipment for even infill application can further enhance the effectiveness of this process.

Conclusion
Installing turf in a backyard can transform an outdoor space into a lush, green oasis, providing a low-maintenance alternative to natural grass. By following the detailed steps outlined in this guide, homeowners can achieve a professional-looking installation that enhances both the aesthetic and usability of their yards.
Key steps include:
- Thorough preparation of the site.
- Ensuring proper drainage.
- Carefully laying down the turf while addressing common installation issues.
From clearing the area and leveling the ground to securing the turf and applying infill, each phase is critical for a successful outcome. Additionally, troubleshooting potential problems such as wrinkles, uneven surfaces, and drainage issues can prevent long-term complications, ensuring that the new lawn remains vibrant and functional.
Ultimately, investing time and effort into the correct installation of artificial turf can yield significant rewards, including reduced maintenance and a beautiful outdoor space that can be enjoyed year-round. For those contemplating this project, embracing the step-by-step approach and being mindful of best practices will lead to a satisfying and lasting transformation of their backyard.
Frequently Asked Questions
What is the first step in preparing my backyard for turf installation?
The first step is to clear the area by removing any existing grass, weeds, and debris. Use a shovel or sod cutter to dig down approximately 3-4 inches to eliminate roots and ensure a clean surface.
How can I ensure proper drainage in my backyard before installing turf?
To ensure proper drainage, the ground should slope away from any structures to prevent water pooling. A recommended slope of 2% is ideal for effective drainage.
What should I do to level the ground before turf installation?
Use a rake to level the ground and fill in any low spots with soil or gravel. Compact the soil using a plate compactor or hand tamper to create a stable base for the installation.
Is it necessary to install a weed barrier before laying turf?
Yes, it is essential to lay down a geotextile fabric or weed barrier to prevent weeds from growing through the turf, which helps maintain the integrity of the installation over time.
What type of base material should I add before installing turf?
Spread a layer of crushed rock or decomposed granite, approximately 2-3 inches thick, over the surface. This layer provides a solid base for the grass and assists in drainage, and it should be compacted thoroughly before proceeding.
List of Sources
- Prepare Your Backyard for Turf Installation
- Top Trends in Artificial Turf for 2025: What to Expect - The Turf Yard (https://theturfyard.com/top-trends-in-artificial-turf-for-2025-what-to-expect)
- Artificial Turf Market Size And Share | Industry Report, 2033 (https://grandviewresearch.com/industry-analysis/artificial-turf-market)
- TurfMutt Foundation release 2026 backyard trends (https://gardencentermag.com/news/turfmutt-foundation-2026-backyarding-trends)
- Considering synthetic turf? What homeowners should know before installation - News (https://blogs.ifas.ufl.edu/news/2025/07/15/considering-synthetic-turf-what-homeowners-should-know-before-installation)
- Lay Down and Cut the Artificial Turf
- thekyagroup.com (https://thekyagroup.com/projects/category/SYNTHETIC+TURF)
- Case Studies: Landscape & Recreation - Synthetic Turf Council (https://syntheticturfcouncil.org/page/Case_Studies_2)
- How to Get a Quote for Turf Installation (https://gappsi.com/2026/02/11/get-quote-turf-installation-2)
- Waterloo Turf Blog | Artificial Grass Tips & Turf Industry News (https://waterlooturf.com/blog)
- Artificial Grass News | American Syn-Turf Industry Updates (https://americansynturf.com/news)
- Secure and Finish Your Turf Installation
- artificialturfsupply.com (https://artificialturfsupply.com/how-to/how-to-secure-artificial-turf-perimeter-edges-galvanized-nails-or-sod-staples)
- Artificial Turf Infill Options (Pros, Cons & Best Uses) | US Turf (https://usturfsandiego.com/news/artificial-turf-infill-options)
- themotzgroup.com (https://themotzgroup.com/infill_blog/how-many-pounds-of-infill-do-you-need-per-square-foot-of-turf)
- Mastering the Art of Artificial Turf Installation: A Step-by-Step Guide (https://petgrows.com/blogs/news/mastering-the-art-of-artificial-turf-installation-a-step-by-step-guide)
- One moment, please... (https://alloutdoors-sc.com/the-essential-role-of-infill-in-artificial-grass-systems)
- Troubleshoot Common Turf Installation Issues
- turfrocks.com (https://turfrocks.com/backyard-drainage-turf-case-study)
- Guide to Leveling an Uneven Lawn (https://backyardboss.net/leveling-uneven-lawn-guide)
- Fake Grass Installation Mistakes (and Ways to Avoid Them) (https://southwestgreens.com/blog/fake-grass-installation-mistakes-and-ways-to-avoid-them)
- Top Synthetic Turf Installation Problems and Solutions (https://siteone.com/en/articles/turf-care/top-synthetic-turf-installation-problems-and-solutions)
- 7 Tips for Preventing Wrinkles in Artificial Grass | Purchase Green Artificial Grass (https://purchasegreen.com/blog/how-to-prevent-wrinkles-in-artificial-grass)