Introduction
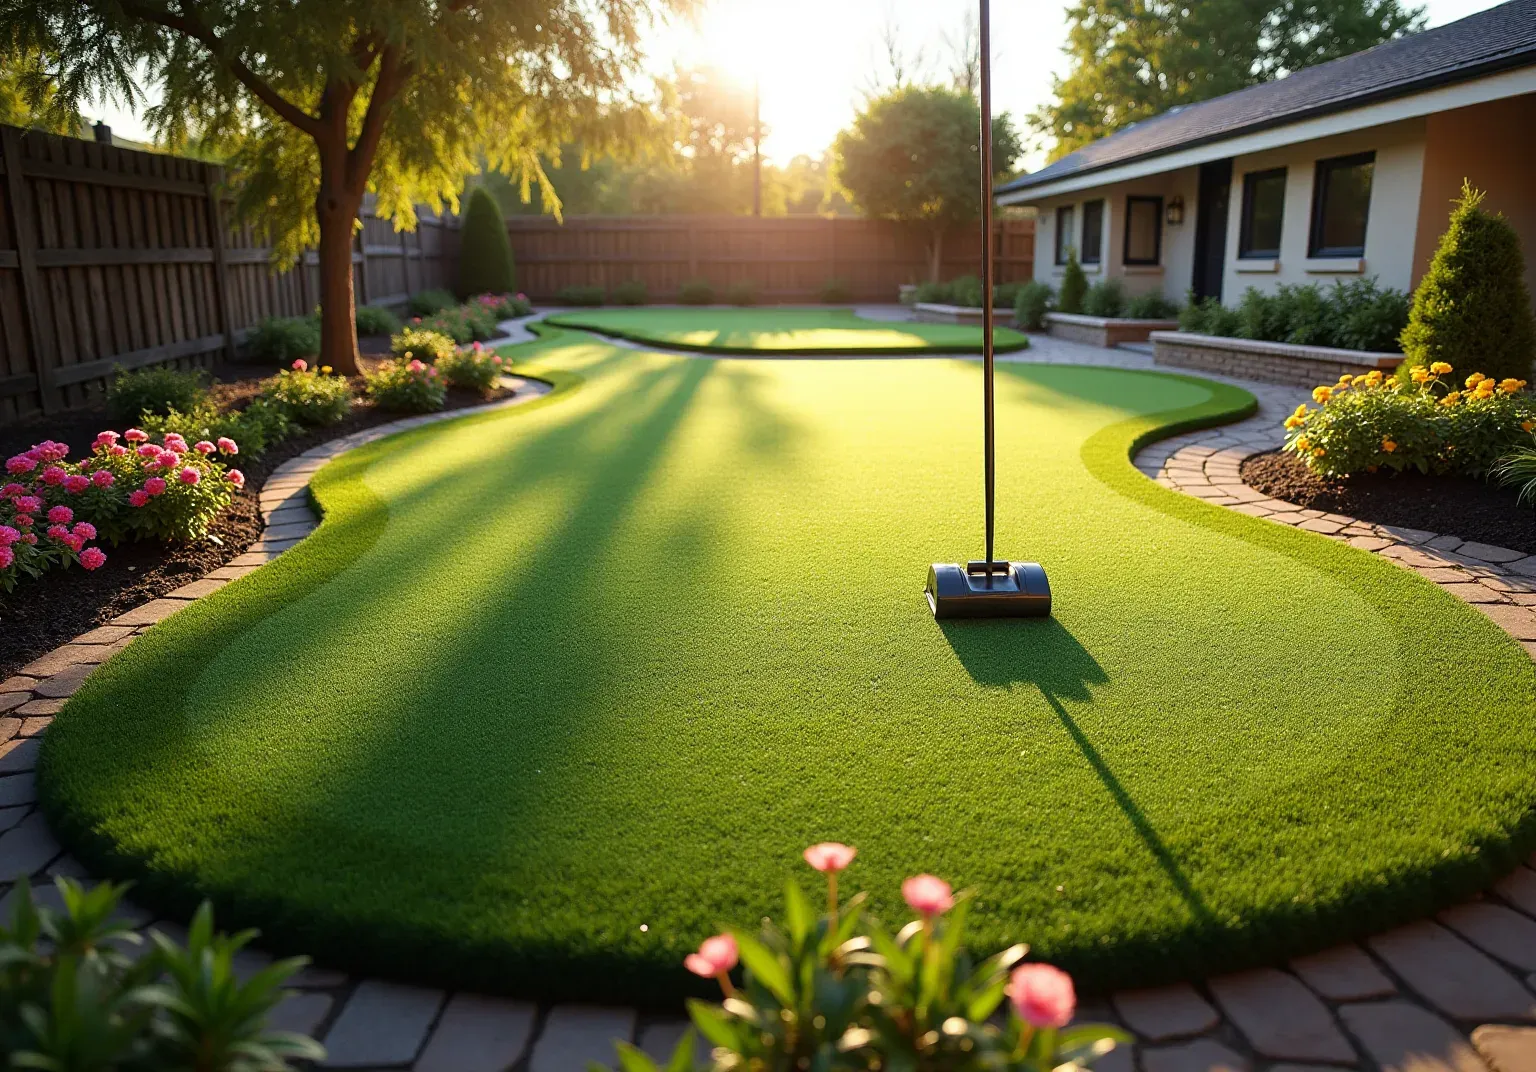
Transforming your backyard into a putting green can create a golfer's paradise, providing a personal space to practice and refine your skills. This guide outlines the essential steps for installing artificial grass putting greens, offering valuable insights on:
- Site selection
- Preparation
- Maintenance
With numerous options available, how can you ensure a professional-quality installation that endures over time?
Select and Prepare the Site for Your Putting Green
- Choose the Right Location: Select a flat area that receives ample sunlight and is free from large trees or structures that may cast shade. Ensure the space is sufficiently large to accommodate your desired , allowing you to experience at home with , especially with super close to my area.
- Check for Drainage: . If water tends to pool, consider an alternative site or plan for a drainage system to maintain the of your golf surface.
- Clear the Area: Eliminate any existing grass, weeds, rocks, or debris from the site. This will create a clean foundation for your super close to my area, ensuring that California Turf Company's yield a durable, long-lasting surface.
- Mark the Layout: Utilize stakes and string to and size of your . This will aid in visualizing the final product and ensuring accurate measurements, paving the way for a tailored solution that aligns with your specific play style.
- Excavate the Area: Dig down approximately 4-6 inches to establish a . This depth facilitates proper drainage and base material placement. Be sure to compact the soil to prevent settling later on, ensuring that your turf provides true ball roll and consistent performance, even with frequent use.

Install the Base and Drainage System
- Prepare the: Start by creating a stable foundation using a mixture of crushed stone or gravel. This must be compacted to prevent shifting and ensure durability, reflecting to providing a long-lasting surface for your golf area.
- Lay the Base: Evenly spread the across the excavated area, targeting a thickness of approximately 3-4 inches. Use a rake to achieve a level surface, which is crucial for and optimal performance of .
- Compact the Base: Use a plate compactor to thoroughly compact the . This step is vital to prevent future settling and to create a smooth, stable surface for the golf area, ensuring true ball roll and consistent performance.
- Install Drainage: If needed, incorporate a . Position these pipes in the lowest areas of the base to effectively channel water away from the golf surface, minimizing the risk of pooling. Be aware that slow drainage may signal issues with the sub-base layer, so ensure proper grading to maintain the integrity of your .
- Test the Drainage: Before moving forward with further installation, pour water over the base to confirm that it drains properly. Adjust the slope to a recommended 1-3% as necessary to ensure , which is essential for .

Lay and Secure the Artificial Turf
Start your complimentary consultation with for and golf course solutions.
- Unroll the : Begin by carefully unrolling the over the prepared base. Allow it to acclimate for a few hours to minimize wrinkles and ensure it lays flat.
- Cut to Fit: Trim the edges of the grass to match the shape of your green. Utilize a sharp utility knife for .
- Secure the Ground: To secure the grass to the base, use landscape staples or adhesive. Position staples every 6-12 inches along the edges and seams to prevent any movement.
- Install Cups: Cut holes for the and insert them into the ground, ensuring they are flush with the surface for a seamless putting experience.
- Add Infill: If necessary, add infill material to the grass to help it maintain its shape and provide a more realistic feel. Brush the surface to evenly distribute the infill.

Maintain Your Backyard Putting Green for Longevity
- Routine Maintenance: To maintain the pristine condition of your golf surface, it is essential to regularly remove debris such as leaves and soil. Employing a leaf blower or a soft-bristled broom effectively prevents the accumulation of waste, which can negatively impact both the appearance and drainage of the surface.
- Brush the Grass: is crucial for keeping the blades upright and ensuring a natural look. This practice also helps in evenly distributing the infill, which is vital for and surface consistency.
- Inspect for Damage: Conduct , including tears or loose seams. Addressing these issues promptly can prevent further deterioration and of your . Additionally, check the edges and seams for potential weed growth, as dirt accumulation can facilitate weed development.
- Rinse the Surface: Periodically rinsing the surface with water is beneficial for , thus keeping it clean and safe for play. This straightforward step can significantly enhance the overall playing experience. It is advisable to avoid harsh chemicals, as they may damage the fibers.
- Adjust Infill as Needed: Keep an eye on the levels of infill material and replenish as necessary to maintain the desired firmness and appearance of the grass. Proper infill maintenance is essential for ensuring a smooth and accurate ball roll, which contributes to the overall performance of your . Implementing a comprehensive yearly can save costs in the long run while ensuring optimal care.
- Fertilize and Aerate: Utilizing can help maintain the color and resilience of your grass without promoting excessive growth. Furthermore, light aeration can relieve compaction and encourage healthy drainage, thereby preserving the integrity of the turf.

Conclusion
Creating a backyard putting green elevates your golf experience right at home, going beyond mere aesthetics. By carefully selecting the site, preparing the base, and laying down the artificial turf, homeowners can achieve a professional-quality putting surface that significantly enhances practice sessions. Each step is crucial, from ensuring proper drainage to routine maintenance, which keeps the putting green in optimal condition for years to come.
Key takeaways include:
- The necessity of a flat, well-drained area.
- The significance of a solid base.
- The importance of regular upkeep to maintain the grass's appearance and performance.
Every phase of the installation process, from excavation to securing the turf, plays a vital role in achieving a successful outcome. Additionally, understanding maintenance practices, such as debris removal and infill adjustments, is essential for prolonging the life of the putting green.
Ultimately, investing time and effort into the installation and maintenance of an artificial grass putting green not only enhances your home’s value but also provides an exceptional platform for honing your golfing skills. Embrace the opportunity to create a personal oasis that caters to your passion for golf, ensuring that every putt reflects your dedication to the game.
Frequently Asked Questions
What is the first step in selecting a site for a putting green?
The first step is to choose a flat area that receives ample sunlight and is free from large trees or structures that may cast shade.
How should I evaluate the drainage of the site?
You should check for natural drainage in the area. If water tends to pool, consider either selecting an alternative site or planning for a drainage system to maintain the durability and functionality of the golf surface.
What should I do to prepare the area before installation?
Clear the area of any existing grass, weeds, rocks, or debris to create a clean foundation for the artificial grass putting green installation.
How can I mark the layout of my putting green?
You can mark the layout by using stakes and string to outline the shape and size of your golf practice area, which helps visualize the final product and ensures accurate measurements.
What is the recommended depth for excavating the area?
It is recommended to dig down approximately 4-6 inches to establish a level base, which facilitates proper drainage and base material placement.
Why is it important to compact the soil during excavation?
Compacting the soil is important to prevent settling later on, ensuring that the turf provides true ball roll and consistent performance, even with frequent use.
List of Sources
- Select and Prepare the Site for Your Putting Green
- Tour Greens | Backyard Putting Green Cost in 2025 (https://tourgreens.com/backyard-putting-green-cost.html)
- How Much Does a Backyard Putting Green Cost? [2025 Data] (https://homeadvisor.com/cost/outdoor-living/install-a-putting-green)
- How Much Does a Backyard Putting Green Cost in 2026? | Angi (https://angi.com/articles/backyard-putting-green-cost.htm)
- Green Dream | On-Site Closing Tool for Landscape Pros (https://puttinggreendesigner.com/blog/putting-green-installation-cost-2025)
- San Jose Putting Greens: Cost & Installation Guide #Golf (https://heavenlygreens.com/blog/backyard-putting-green-installation-cost-san-jose)
- Install the Base and Drainage System
- Artificial Grass Drainage: What You Need to Know (https://litagrass.com/blogs/lita-artificial-grass-blog/artificial-grass-drainage-what-you-need-to-know?srsltid=AfmBOopveNpBBt3VyGiAOEszUIlNHm4NFMMIOPuBOx6iRo0nPwrvzpae)
- How Artificial Grass Installation Improves Drainage Efficiency - GMG Irrigation System (https://landscaper-georgia.com/blog/how-artificial-grass-installation-improves-drainage-efficiency)
- How Artificial Grass Installations Help Reduce Stormwater Runoff And Improve Local Ecosystems - Florida Water and Pollution Control Operators Association (https://fwpcoa.org/content.aspx?page_id=5&club_id=859275&item_id=131220)
- Does Artificial Turf Drain Well? (https://synlawn.com/articles/does-artificial-turf-drain-well)
- Lay and Secure the Artificial Turf
- As California installs more artificial turf, health and environmental concerns multiply (https://latimes.com/science/story/2025-09-17/californias-love-hate-relationship-with-artificial-turf)
- Synthetic Turf News | News & Blog | Synthetic Turf International (https://synthetic-turf.com/news-blog)
- Artificial Turf Innovations: What's New in 2025? - The Turf Yard (https://theturfyard.com/artificial-turf-innovations-whats-new-in-2025)
- As the world heats up, so does the debate around artificial turf (https://thenewlede.org/2024/08/as-the-world-heats-up-so-does-the-debate-around-artificial-turf)
- Maintain Your Backyard Putting Green for Longevity
- 10 Tips for Maintaining an Artificial Grass Putting Green (https://wintergreengrass.com/10-tips-for-maintaining-an-artificial-grass-putting-green)
- User (https://markets.chroniclejournal.com/chroniclejournal/article/abnewswire-2026-3-6-artificial-turf-cleaning-solutions-gain-popularity-as-property-owners-prioritize-hygiene-and-longevity)
- Essential Best Practices for Maintaining Residential Putting Greens – Hall Turf | Artificial Turf Installation Kansas City KS & MO (https://hallturf.com/essential-best-practices-for-maintaining-residential-putting-greens)
- Artificial Golf Greens Maintenance Tips (https://southwestgreens.com/blog/artificial-golf-greens-maintenance-tips)
- How Long Does Artificial Turf Last? What Homeowners Need to Know - Synthetic Turf (https://syntheticturfnorthwest.com/how-long-odes-turf-last)