Introduction
Transforming a lawn into a lush, green oasis is now more achievable than ever, largely due to the increasing popularity of artificial grass. This practical solution not only minimizes maintenance time but also significantly enhances the aesthetic appeal of any outdoor space. However, the installation process can appear intimidating, with potential pitfalls that may result in costly errors. Homeowners must understand how to navigate the complexities of artificial grass installation to ensure a seamless and successful transformation.
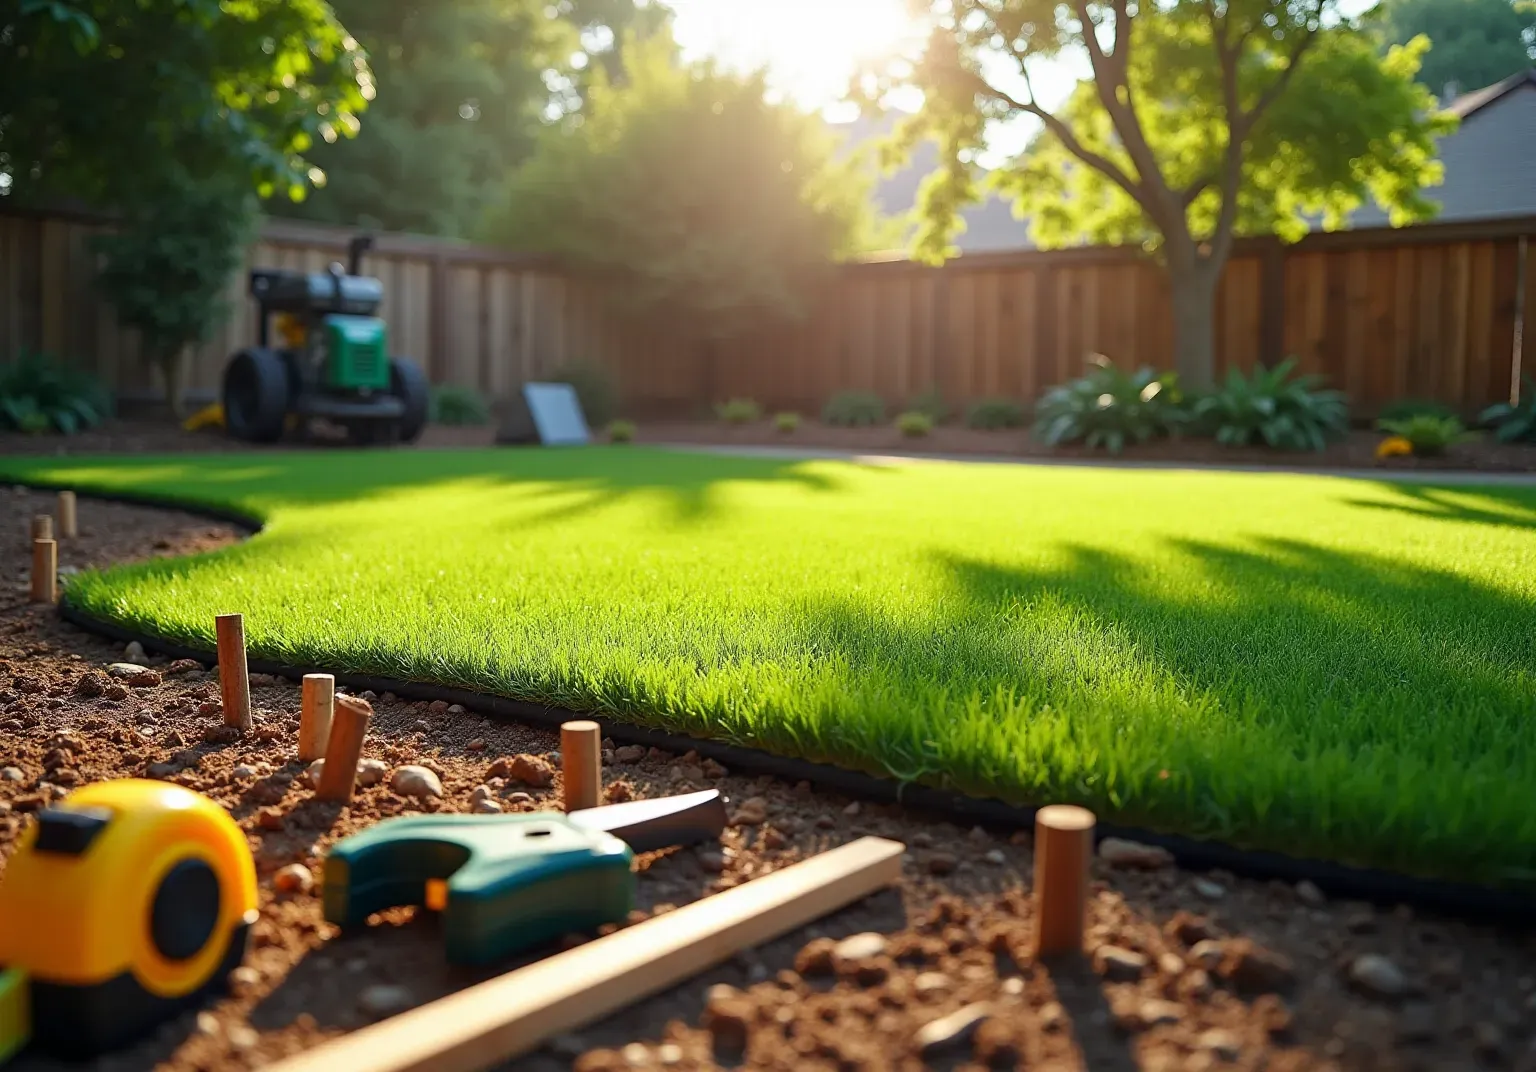
Prepare for Installation: Assess Your Space and Gather Tools
-
Evaluate your space by accurately measuring the area designated for very close to me. Use a tape measure to determine both the length and width, marking corners with stakes or flags. Take note of any obstacles, such as trees, flower beds, or pathways, that may affect the .
-
Evaluate Drainage: Examine the . It is essential to ensure that water does not accumulate beneath the turf, as this can lead to mold growth and material deterioration. If exist, consider solutions such as sloping the base or installing drainage pipes to promote proper water flow.
-
Gather Tools: Collect the necessary tools for the installation. Key tools include:
- Shovel
- Rake
- Utility knife
- Tape measure
- Hammer or mallet
- Turf staples or nails
- Compactor (manual or mechanical)
- Landscape fabric (optional)
-
Prepare Your Mindset: Equip yourself with knowledge about the by reviewing guides or watching instructional videos. This preparation will help you anticipate potential challenges and streamline your workflow, ultimately leading to a more of . Note that the average cost for installing in residential properties in 2026 is approximately $9,418 for a 500 sq. ft. area, which includes material costs of about $2,909, labor costs around $2,000, and hauling costs estimated at $1,100. Additionally, be aware that by approximately 5% when selling. Thorough preparation is crucial to avoid .

Prepare the Base: Create a Solid Foundation for Your Grass
- : Begin by using a shovel to clear the installation area of any existing grass, weeds, and debris. Excavate to a depth of 4 inches, which is essential for establishing a solid base that supports the durability of your . Experts recommend this depth to ensure stability and prevent issues such as sinking and pooling over time.
- : After clearing the space, use a rake to . Fill in any low spots with soil and compact it to create a smooth surface. This step is vital to avoid bumps in the finished surface, ensuring a uniform appearance and performance. Notably, , making a well-prepared surface crucial for safety, particularly for families with children.
- : Spread a layer of crushed stone or gravel, approximately 2 to 3 inches thick, over the leveled area. This material is essential for providing excellent . Employ a plate compactor to thoroughly compact the base material, as a well-compacted sub-base can help the grass withstand wear and tear for over a decade. As noted by Elite Turf Supply, "By , incorporating quality base material, and compacting it correctly, you’ll ensure your grass is prepared for years of use."
- Install a: to prevent weeds from growing through the grass. While this step is often viewed as optional, it is highly recommended for . It helps maintain the integrity of the installation and prevents weed growth, which can compromise the turf's appearance and durability.
- Final Leveling: Rake the surface again to ensure it is even and smooth. Check for any remaining bumps or dips, making adjustments as necessary to create a flawless foundation for your new lawn.

Fit the Turf: Customizing Grass to Your Space
- Roll Out the Turf: Begin by unrolling the over the prepared base. Allow it to lay flat for a few hours to acclimate, which helps reduce wrinkles and ensures a .
- Trim the Edges: Utilize a utility knife to carefully , ensuring it fits the contours of your space. Leave a slight overhang of about 1-2 inches to guarantee complete coverage and a polished look.
- Check for Fit: Position the grass in place and inspect for any gaps or overlaps. Adjust as necessary to achieve a snug fit against borders or obstacles, ensuring a seamless appearance.
- Seaming: For setups requiring several sections of grass, employ to connect them firmly. Following the manufacturer's instructions will yield the best results and enhance durability.
- Secure the Grass: Once the grass is fitted, secure it in place using staples or nails, placing them every 6-12 inches along the edges and seams. This prevents movement and preserves the integrity of your setup.
Statistics indicate that after transitioning to artificial turf, making this choice not only practical but also time-efficient. are essential for achieving a flawless finish, ensuring that your synthetic turf installation looks professional and endures for years.
Ready to transform your lawn? Contact today to initiate your and , as well as very close to me, tailored to your needs!

Finalize Installation: Secure Edges and Apply Filler
- Secure the Edges: To keep the grass firmly in place, use , spacing them about 4 to 6 inches apart. This method is especially important at corners and seams, where extra support is necessary to prevent lifting and maintain a clean finish. Drive the nails down three-quarters of the way to avoid pulling down the grass blades.
- : For a polished appearance, of the grass beneath any borders or hardscaping. A putty knife can assist in achieving a neat tuck, creating a seamless transition between the grass and surrounding surfaces.
- : Evenly distribute durafill sand granules across the grass surface. Using a helps work the infill into the fibers, which not only keeps them upright but also , enhancing its stability.
- : After applying the infill, conduct a with a heavy bristled broom, pulling against the grain of the turf. This step ensures even distribution of the infill and fluffs the grass blades, contributing to a natural appearance. Be sure to remove any excess debris afterward.
- : Perform a thorough walk-around of the area to identify any loose edges or uneven spots. Make necessary adjustments to ensure a flawless finish, meeting both aesthetic and functional standards. Routine checks every few months are advisable, particularly for areas with heavy use.

Conclusion
Successfully installing fake grass requires careful planning, preparation, and execution. Homeowners can transform their outdoor spaces into lush, green areas that demand minimal maintenance by following the outlined steps. This guide emphasizes the importance of assessing the installation space, preparing a solid foundation, fitting the turf correctly, and finalizing the installation for a professional finish.
Key insights include:
- The necessity of proper drainage to prevent water accumulation.
- The significance of leveling the ground for safety.
- The value of using quality materials.
Additionally, the time-saving benefits of artificial turf installation are noteworthy, showcasing how homeowners can reclaim hours previously spent on lawn care.
Ultimately, embracing synthetic grass not only enhances the aesthetic appeal of a property but also provides a practical solution for busy lifestyles. By taking the time to understand and implement each step of the installation process, homeowners can ensure a successful outcome, paving the way for years of enjoyment in a beautifully maintained outdoor environment. For those ready to make the leap, reaching out to local experts can provide tailored solutions that meet specific needs and preferences.
Frequently Asked Questions
How should I assess the space for fake grass installation?
You should accurately measure the area designated for installation using a tape measure to determine the length and width. Mark corners with stakes or flags and take note of any obstacles like trees, flower beds, or pathways that may affect the installation.
Why is it important to evaluate drainage before installation?
Evaluating drainage is crucial because water accumulation beneath the turf can lead to mold growth and material deterioration. If there are drainage issues, solutions such as sloping the base or installing drainage pipes may be necessary to ensure proper water flow.
What tools are necessary for installing fake grass?
The key tools needed for installation include a shovel, rake, utility knife, tape measure, hammer or mallet, turf staples or nails, and a compactor (manual or mechanical). Landscape fabric is optional.
How can I prepare myself mentally for the installation process?
Equip yourself with knowledge about the installation process by reviewing guides or watching instructional videos. This preparation helps you anticipate challenges and streamline your workflow for a more successful installation.
What is the average cost for installing synthetic turf in 2026?
The average cost for installing synthetic turf in residential properties in 2026 is approximately $9,418 for a 500 sq. ft. area, which includes material costs of about $2,909, labor costs around $2,000, and hauling costs estimated at $1,100.
How might installing synthetic turf affect my property's value?
Installing synthetic turf may reduce your property's value by approximately 5% when selling.
What should I keep in mind to avoid unexpected expenses during installation?
Thorough preparation is crucial to avoid unexpected expenses, so ensure you assess the space accurately, evaluate drainage, and gather all necessary tools before starting the installation.
List of Sources
- Prepare for Installation: Assess Your Space and Gather Tools
- How To Prepare Your Home for Artificial Grass Installation: 5 Expert Tips - SGW Colorado (https://sgwcolorado.com/blog/2025/08/28/how-to-prepare-your-home-for-artificial-grass-installation-5-expert-tips)
- How Much Does Artificial Grass Cost in 2026? (https://lawnstarter.com/blog/cost/artificial-grass-price)
- Artificial Grass Installation Cost: 2026 Price Guide (https://installartificial.com/how/cost-of-artificial-grass-installation)
- shawgrass.com (https://shawgrass.com/about/news-blog/how-to-prep-for-artificial-grass-installation)
- Prepare the Base: Create a Solid Foundation for Your Grass
- 4 Essential Facts About Installing a Sub-Base Under Your Artificial Turf | Synthetic Grass Warehouse (https://syntheticgrasswarehouse.com/blog/4-essential-facts-about-installing-a-sub-base-under-your-artificial-turf)
- How to Prepare the Base for Artificial Grass | Professional Installation Guide (https://globalsynturf.com/site-base-preparation)
- Guide to Artificial Turf Base Prep | Elite Turf Supply (https://eliteturfsupply.com/blogs/preparing-ground-for-artificial-grass)
- UF/IFAS expert evaluates impact of installing synthetic turf (https://mainstreetdailynews.com/local-living/uf-ifas-impact-installing-synthetic-turf)
- Fit the Turf: Customizing Grass to Your Space
- A Step-by-Step Guide to Installing Artificial Turf Grass (https://lowes.com/n/how-to/install-artificial-grass)
- Artificial Grass, Market Trends, Business Insights, and Analysis (https://installartificial.com/how/artificial-grass-business-insights-market-trends)
- Case Studies of Urban Turf Solutions Residential Projects (https://urbanturfsolutions.co.nz/the-ultimate-guide-to-artificial-grass/artificial-grass-for-residential-landscaping/case-studies-of-urban-turf-solutions-residential-projects)
- Case Studies (https://urbanturfsolutions.co.nz/case-studies)
- Top Trends in Artificial Turf for 2025: What to Expect - The Turf Yard (https://theturfyard.com/top-trends-in-artificial-turf-for-2025-what-to-expect)
- Finalize Installation: Secure Edges and Apply Filler
- How To Install Artificial Grass | SGW (https://syntheticgrasswarehouse.com/resources/installing-artificial-grass/step-by-step-guide-to-installing-artificial-grass)
- How to Secure Artificial Turf Perimeter Edges: Galvanized Nails or Sod Staples (https://artificialturfsupply.com/how-to/how-to-secure-artificial-turf-perimeter-edges-galvanized-nails-or-sod-staples)
- Backyard Drainage & Turf Installtion Case Study | TurfRocks (https://turfrocks.com/backyard-drainage-turf-case-study)
- How Infill Affects Artificial Grass Performance and Longevity - Artificial Turf Express (https://artificialturfexpress.com/blog/artificial-grass-infill-performance-longevity)